Creative Recipes

Creative Recipes do you have any? I was going to start this post by saying that the Creative Department was idle. But that is not quite true. I think we are mostly unaware of the ‘creating’ we do in our daily life.

Where am I when I am not in the Creative Space

I spend much of my time in the kitchen -making something. We eat very little food that comes in a package, so I spend quite a bit of time… making something, dinner, breakfast, dessert, or the components of meals. Most of what we eat started with a recipe or flavor profile. We have tweaked or changed it to suit our tastes. That is creativity!

I am blaming the added time in the kitchen on the recent acquisition of a dehydrator. I have discovered that it is so much fun to dry foods. We of course make the usual Sliced Cinnamon Apples and Jerky. For the apples, the preparation is less than an hour and finished in the machine by dinner. Jerky not so much. I can’t leave it alone so I have stopped making it! I have experimented with drying tomatoes, carrots, zucchini, onions, broccoli, beets, citrus, and mushrooms. The powders allow for adding to recipes and opening a world of flavor and fun. Once the dehydrated veggies dry, I grind them into a powder for adding here and there to the foods. What a great way to feed the family more veggies! Even better is that most of the time they don’t even taste them!!!

A couple of trays of beets in the dehydrator

We do not waste any food these days. Of the parts we don’t use, some goes out to the cows, (yes that is now a plural), and when we have pigs, some goes there, (more pigs will be arriving in the spring), the chickens get the bits they like and the rest to the compost bin. Meat is the only thing that ends up in the actual trash. I could make a vegetable broth from the produce bits, but nah… you have to draw the line somewhere!!!

How is the kitchen similar to sewing?

So where or how does the above tie into Creativity? A recipe is a pattern, with ingredients and amounts just like a pattern for making something, like a quilt or a bag or a dress. We can make it exactly like the pattern or modify it on the fly or after making the first draft. You can change it in so many ways to give it your own twist. The colors, the size, the number of borders, pockets, ruffles, trims, or the arrangement of the blocks or other main elements. A pattern is just the starting point to make it your own!!!

Making up a ‘Table’ recipe

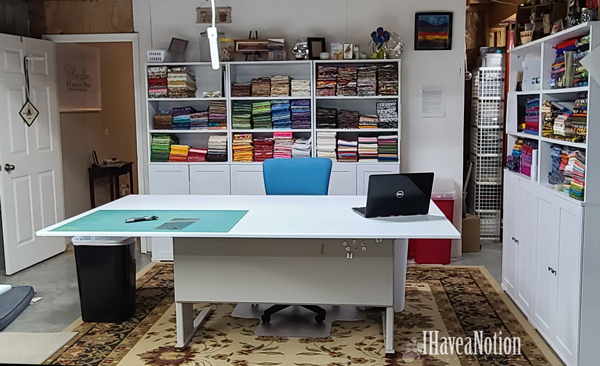
For the Creative Space, I made my tabletop. I am not quite happy with it and may get a new sheet of melamine. The finish was in worse shape than I thought. I was able to inspect it more closely once I got it home from the store. I will live with it for a few weeks/months and make a decision… about replacing it. After working on a 36″ x 45″ table it feels great to spread out! I started with an 8′ sheet and ended up cutting it down to 7 feet long, so the overall size is 48″x84″. The current top is not permanently attached. I have it cleated in place just in case I decide that the top is too rough to stay.
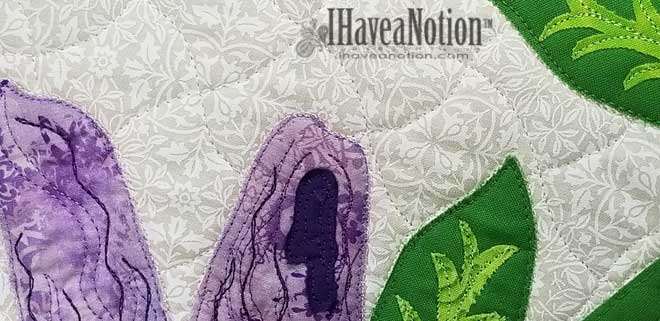
The new big table top

My Letter “Z”

One of the other things I worked on while determining the allocation of the space and workflow was this little Letter! It began as a sample stitch out and left unfinished as a visual. The overall size is about 9 inches square. So far, most of the letters I’ve made use a similar recipe to create. All of the stitching on this little piece is free-motion. I stitched the letter with a green variegated King Tut, a trilobal Rainbows, and a sparkly metallic green and did the free-motion quilting with a solid green cotton thread, (although in the picture it appears variegated).

Do your modify a pattern to make it your own? All the time? Just once? Never?

More Later…. Beth

Time Flies

Tasks -whether they are mundane, ordinary or exciting hide how fast the Time Flies!

It is hard to believe we have been here for nearly 6 weeks. All the rush of packing is over… and now the unpacking takes place. As a result, of all the deadline-based activity time flies?

About July

The month of July was hot and steamy and the pasture was alive with butterflies. Of course, I had to drop everything several days and record with the camera as many as I could. I saw many of the Kentucky butterflies in one field and it is in my backyard! The Swallowtails, Monarchs, Cabbage Whites, Clouded Yellow, Admirals, Sprites, and Skippers feeding on the wildflowers in the field.

Black Tiger Swallowtail Butterfly
A Black Tiger Swallowtail Butterfly on Red Clover

Rain

In Kentucky, we are technically in a drought and surface plants are struggling without rain. See time flies even for plants. In addition, the rain has been sporadic and uneven, so the ground has not had a good soaking. As a result, we cut the field short.

Yellow Tiger Swallowtail Butterfly
Yellow Tiger Swallowtail on Red Clover

August

The middle of August found me in Chicagoland for a week. It was planned more than a year ago, well before the idea to move. I shared some of my quilts with the Pride of the Prairie Quilt Guild of Plainfield, IL and the ‘Threadpainting’ process that I use the following day. Sorry, I didn’t take any pictures… because I never remember to get the camera out. I try to focus (pun intended) on assisting and coaching others through the “Threadpainting” process. Once again, times flies!

Gifted a beautiful little pincushion!

I do have one picture. A wonderful little pincushion, with a matching teeny tiny 9 Patch Quilt (which is signed and dated by the maker) Cheryl Parker, was a gift. Cheryl also created a fabulous blog post about the Threadpainting class, and you can see it here. This little pincushion will join the other treasures gifted by friends and family, in the Creative Space. However, setting up the Creative Space up is a very slow process. There is one certainty, many things need to be done… at the same time, and I am having difficulty prioritizing. Again, time flies!

Next week

2019 Online Quilters Meet and Greet
There will be prizes!!!

I hope I have filled you in… a bit… and forgive me for the lapses in posting. …. I am here even if I am quiet, (which anyone that knows me will say is a feat that does not happen often {enough, maybe?}).

More Later!!! Beth

A Little Sticky, Some Blue and a TIP

the "chickens" on the longarm

Its been a little sticky and blue In the Creative Space. A picture of the ‘chickens’ loaded on the longarm was in the last post. So far that hasn’t changed, still no thread.

The Sticky

So what about the sticky and blue? I use a lot of fusible products and I try as many as I can find and afford. The favorite is paper backed, because I can draw my design and then transfer to fabric, with very little waste of either. I love Misty Fuse because it stays soft and retains a beautiful drape. Since Misty Fuse is just a web, getting the exact result is more difficult, because you need another way to transfer the marked lines/design to Misty Fuse, which can add another step to the process.

photo showing good stick with Barely There Fusible
Good Stick!

Last year I tried Barely There (the review) and in the store here. The few small things I tried it on worked out for the most part. Except for the occasion, where I forgot to use the correct heat setting on the iron. Oops! I used both Barely There and Misty Fuse on the ‘chicken’ quilt. Barely There for the construction of the chickens and egg flowers. While stitching down the chickens, I discovered some loose pieces. Not completely coming off, but enough that things could have shifted. So a bit more testing was in order.

I was afraid that I may have made an error when I decided that I liked Barely There! What could possibly make a fusible not stick well? The only thing, if all else was done correctly; the proper iron temperature and setting (made that mistake with the gecko) and/or the correct amount of pressing time would be the fabric. What could be wrong with the fabric? With fabric, the manufacturers finish or starch will keep a fusible from adhering well. So I prewashed the fabrics for this piece. Then I printed the pattern on to the Barely There, fused them to fabrics and proceeded. Verdict? Much better stick!

Stick was very important in this case because this piece is raw edge applique using regular quilting cotton, not batiks which have a finer thread and tighter weave. Regular ‘quilting’ cotton tend to have a thick thread and looser weave, making them susceptible to fraying. By prewashing the fabric good stick was achieved and with less fraying on all fabrics!

The Blue

the piece with the blue lines drawn

So what about the blue part of the sticky and blue? For the quilting, I drew a grid with a blue washout marker. Getting rid of the grid after quilting these days is the real problem, especially if you don’t always prewash your fabrics, (ask me how I know about this too). I have been sewing and quilting long enough that I remember the marks coming out fairly well with just a spritz if only one layer, and maybe a good wetting if more than one layer, (top, batting, backing). But here lately, you might actually have to submerge a project to get the blue out.

a corner with blue lines and lines erased with water

I have used just about every product made to remove the blue, and none of them seemed to work any better than water if they did anything at all. But while surfing, reading blogs and posts on the Internet, Facebook or Instagram, one day- I ran across a tip. Wish I could remember from where and give the kudos and credit and link directly to their page, but I can’t. (edit- I found it!) For the story from the tipper go to www.piecenquilt.blogspot.com I even tried a search and a look back through daily history. But no such luck. If you know who…please tell me, I’ll add it!

The Tip

Quilting done, blue lines gone

Mix 1 teaspoon of baking soda with 1 cup cold water. Mix well and place in a spray bottle. And then proceed as normal. All the blue came out, no resprays or touch-ups. I left a corner and as you can see, it was a rather thickish line. I used the Mark-B-Gone from Dritz, it makes a thick line but marks fast and for a simple grid, it works great! Going to keep a spray bottle with soda water in it. I suppose a flat bottle , (as in no bubbles), of soda water would work too, now that I think about it!

Have you had difficulty getting the blue out? Do you have another method that works well? Please share in the comments if you do!!!

More later-Beth