Finally a post. As usual, the background happenings have taken most of the available time, so…
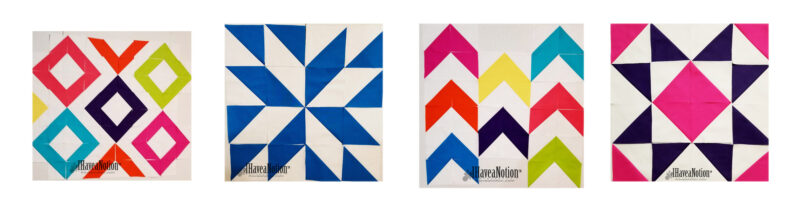
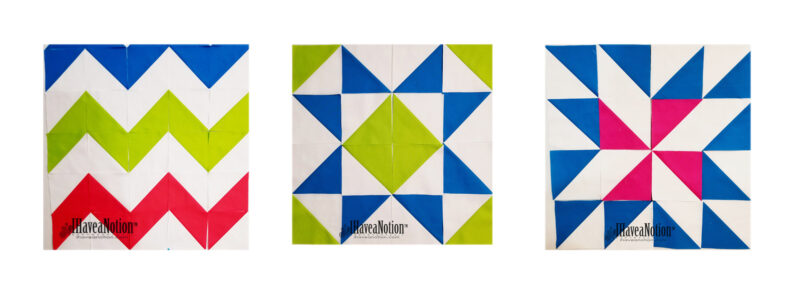
What does this…
and this…
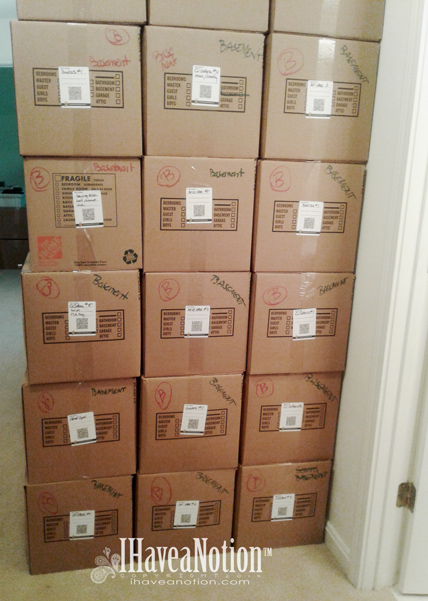
have in common?
If you said a move. You’re right.
Stay tuned for more!!! Beth
Finally a post. As usual, the background happenings have taken most of the available time, so…
If you said a move. You’re right.
Stay tuned for more!!! Beth
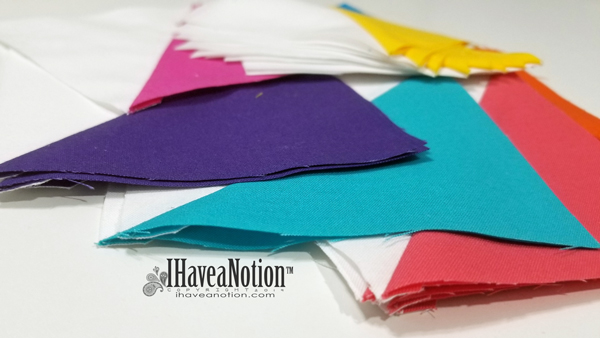
Now that all the blocks have been sewn, cut and pressed open, it was time to start squaring up and trimming the blocks. I used the 5 inch Quilter Select Ruler, the same one I used in the blog post about Using the Tools, when the squares were originally subcut from the fabric strips.
The 5″ square Quilters Select ruler is just the right size; since the blocks are to be squared at 4 1/2” and it is easily picked up and moved about with just one hand. As I get older I find that my hands do not want to work any harder than they have to.
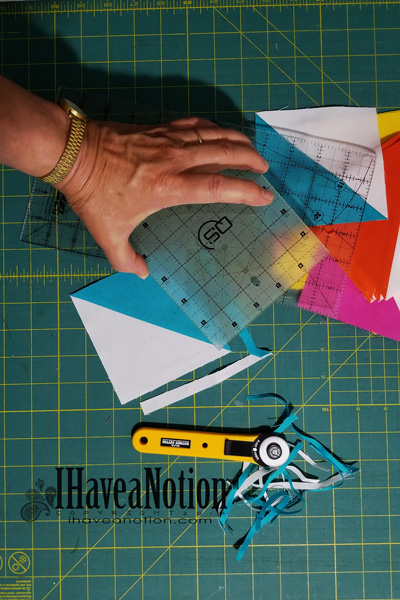
The Quilters Select non-slip coating makes accurate cut easier. One of the things that often takes the joy out of creating is when my ruler slips. It makes me feel frustrated and inadequate, especially, when I have ruined a piece of fabric or a block because the ruler slipped. I have found that the coating on these rulers really helps them stay in place, especially when squaring up a block.
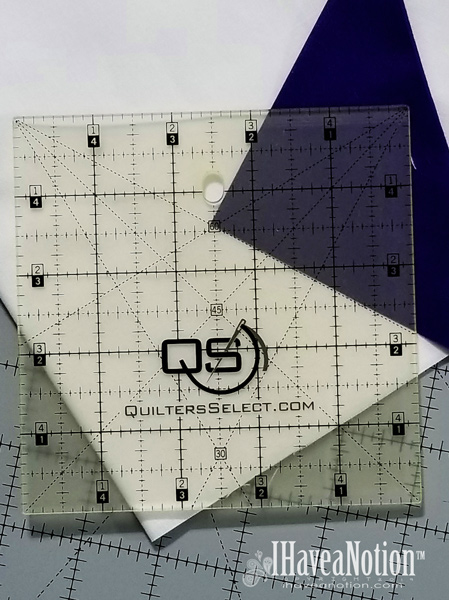
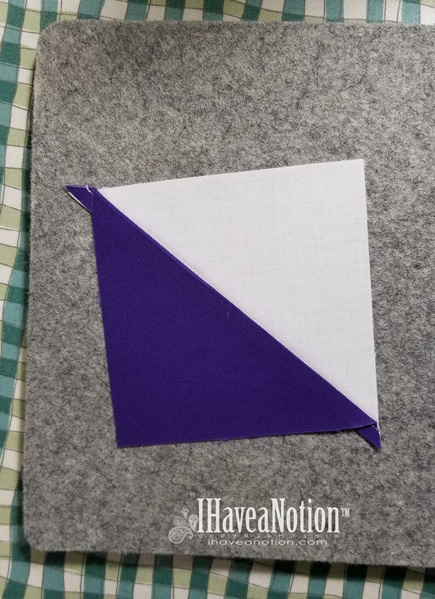
One of the most helpful aspects of the Quilters Select Rulers is the angle guidelines (30°, 45°, and 60°) and most of the rulers have 2 sets of the angle guidelines. You can see (in the photo below), the first set of angle lines, where the blue meets the white and the second set at the bottom of the block in the white.

Once, all the blocks were pressed, next came squaring up the half-square triangle blocks. To square up, I lined the 45°line up on the diagonal seam line, very close to the top edge of the square, and trimmed the first two sides, (the right side and the top). I then took ruler off; turned the block and trimmed the other two sides, by again lining up the 45° line on the diagonal seam and the 4 1/2 inch dashed lines on the 2 previously trimmed sides. There were 8 colors, plus the white and a bit of black, and each combination had 32 squares for a total of 256 half triangle blocks!

I discovered while squaring up these blocks, that the ability to turn the ruler and the fabric together (the trick)only happens on the Quilters Select Mat. If using any other brand of mat that is not as smooth as the Quilters Select mat, (like the Olfa and Fiskars mats that seem to have a slightly rougher texture), “The Trick” doesn’t work. But I like the non-slip aspect of the ruler, more than the ability to turn the block or squaring up!!!
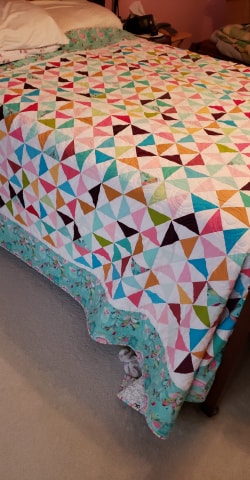
After squaring up all the half-square triangle blocks, I took them to the design wall… Originally what little plan I had when I began this project, has almost come together. I chose the colors after going to QuiltCon 2019. I blogged here and here about the what I saw at Quiltcon. However, I was not happy with any of the experimental designs I played with on the design wall.
But I finally landed on a design. I discovered, on Facebook, a subtle hourglass quilt created by a friend, (Betty Elliott), and thought “That’s IT!” An hourglass quilt. Isn’t it beautiful?
Next up the question of the borders. Do you plan everything before you start a project, or do you just start with a thought and grow from there? I think you can guess how I start… most of my projects… How do you start yours?
Beth
Taking a slight detour to talk about another amazing tool for the sewing room. Aside from accurate cuts and seam allowances, another place accuracy counts is when pressing. I have been using a Wool Pressing Mat recently and I LOVE it. I can’t believe we thought the ironing board, with a foam pad or a pressing board with cotton batting, was good enough!
The Wool Pressing Mat is a game changer when pressing seams for quilting, and well just about any other seam you need to press; whether quilting, crafting or creating garments. It makes those seams behave beautifully.
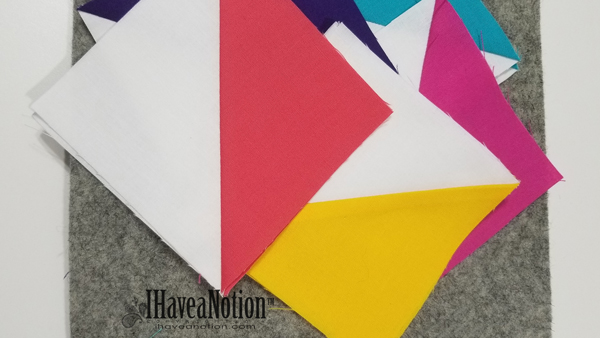
Since this quilt is primarily half square triangles, there was plenty of room for error when pressing them open. So this was the perfect time to document how well the pressing mat does when pressing a bias seam.
When you use a wool pressing mat several things come in to play. The most difficult seam to press is a bias seam, like the one in a half square triangle block. How many times have you pressed a half square triangle block open, (or any block), on an ironing board, only to discover that you have pressed inaccurately? Maybe not you, but that the block moved and so did the bias of the square. Then when trying to correct the seam, it will not press out or it has stretched the block, or… well is just not right! I know it is difficult to tell when you are pressing a seam or ironing a seam… add steam and it could be worse!
Before you ask, I almost always use steam. I like it.
So to test the wool pressing mat I pressed every single seam of this top using a wool pressing mat. The half square triangle blocks pressed beautifully. Flat and crisp without any distortion.
Three ways a Wool Pressing Mat makes for a great pressing surface
When you press on a wool mat, the wool holds the fabric in place, while you gently press. The fabric or block does not slide or slip while pressing. In this case, the white half was on the mat while I opened the color side to press flat.
Wool naturally has a bit of moisture in it, so you get a slight benefit even without pressing with steam. However, if you like steam, it absorbs the steam so the heat and moisture from steam work from the top and the bottom. The pressing mat may become warm and or damp, and if pressing on a cutting mat or on other sensitive surfaces, may cause damage.
The reason you get such a crisply pressed seam is that the wool gives a bit, unlike pressing on a padded ironing board or pressing board, (cotton batting compress firmer than wool). And if you are a turned applique fan, you won’t believe how nicely your applique flattens without creating puckers and tucks!!
If you have a preference to which side to press the seam to, place the block (half square triangle block in this case), on the pressing surface with the light fabric on the bottom, (or the side you want to press the seam ‘away’ from). Set the seam, (before opening the block, press the line of stitching), next gently lift open the block and using light pressure nudge along the entire seam to open with the iron. You always have better control of the seam when you press from the top.

I also pressed all the joining seams on the wool mat and it lays perfectly flat! Do I like a pressing mat? Absolutely! And so will YOU! It solves several pressing issues, such as stretching and distortion, adds padding for pressing turned edge applique or embroidery, and enhances the power of the iron with or without steam. The wool pressing mat is 100% natural, felted wool. Environmentally friendly and even more, helps you to create with even better results. Several sizes of Wool Pressing Mats are in stock. Look for your favorite sizes 4 1/2″ Square, 8 1/2″ Square, 13 1/2″ Square and the 14×19″ Rectangle Pressing Mats at I Have A Notion™.
Have you tried a Wool Pressing Mat? Did you like it? Did you have the same experience as I? Please share your opinion in the comments. I would love to hear your thoughts.
This post is a continuation from “Using the Tools” and where this quilt top started.