Squaring UP: using Quilters Select Ruler

Now that all the blocks have been sewn, cut and pressed open, it was time to start squaring up and trimming the blocks. I used the 5 inch Quilter Select Ruler, the same one I used in the blog post about Using the Tools, when the squares were originally subcut from the fabric strips.

3 reasons to use Quilters Select Ruler for squaring up

Reason 1- picking it up

The 5″ square Quilters Select ruler is just the right size; since the blocks are to be squared at 4 1/2” and it is easily picked up and moved about with just one hand. As I get older I find that my hands do not want to work any harder than they have to.

Picking up with one hand
Using the ruler with one hand

Reason 2- non-slip

The Quilters Select non-slip coating makes accurate cut easier. One of the things that often takes the joy out of creating is when my ruler slips. It makes me feel frustrated and inadequate, especially, when I have ruined a piece of fabric or a block because the ruler slipped. I have found that the coating on these rulers really helps them stay in place, especially when squaring up a block.

The 5" Square Quilters Select tint
The non-slip coating is yellow and lends a frosted look to the ruler

Reason 3- squaring up made simple

One of the most helpful aspects of the Quilters Select Rulers is the angle guidelines (30°, 45°, and 60°) and most of the rulers have 2 sets of the angle guidelines. You can see (in the photo below), the first set of angle lines, where the blue meets the white and the second set at the bottom of the block in the white.

showing the 2 sets of angle lines on 5 inch Quilters Select ruler
The 2 sets of Angle Lines on the Quilters Select ruler

Once, all the blocks were pressed, next came squaring up the half-square triangle blocks. To square up, I lined the 45°line up on the diagonal seam line, very close to the top edge of the square, and trimmed the first two sides, (the right side and the top). I then took ruler off; turned the block and trimmed the other two sides, by again lining up the 45° line on the diagonal seam and the 4 1/2 inch dashed lines on the 2 previously trimmed sides. There were 8 colors, plus the white and a bit of black, and each combination had 32 squares for a total of 256 half triangle blocks!

Stack of trimmed and squared half-square triangle blocks
Pressed, trimmed and stacked half-square triangle blocks

A note about “The Trick”

I discovered while squaring up these blocks, that the ability to turn the ruler and the fabric together (the trick)only happens on the Quilters Select Mat. If using any other brand of mat that is not as smooth as the Quilters Select mat, (like the Olfa and Fiskars mats that seem to have a slightly rougher texture), “The Trick” doesn’t work.  But I like the non-slip aspect of the ruler, more than the ability to turn the block or squaring up!!!

Designing the Quilt Top

After squaring up all the half-square triangle blocks, I took them to the design wall… Originally what little plan I had when I began this project, has almost come together. I chose the colors after going to QuiltCon 2019. I blogged here and here about the what I saw at Quiltcon. However, I was not happy with any of the experimental designs I played with on the design wall.

I played

Four Block Ideas
4 possible ideas

and played a bit more

Three Alternative Block Ideas
3 More possible ideas

But I finally landed on a design. I discovered, on Facebook, a subtle hourglass quilt created by a friend, (Betty Elliott), and thought “That’s IT!” An hourglass quilt. Isn’t it beautiful?

Inspirational Hour Glass Quilt
The inspiration quilt B Elliotts Hourglass Quilt

Next up the question of the borders. Do you plan everything before you start a project, or do you just start with a thought and grow from there? I think you can guess how I start… most of my projects… How do you start yours?

Beth
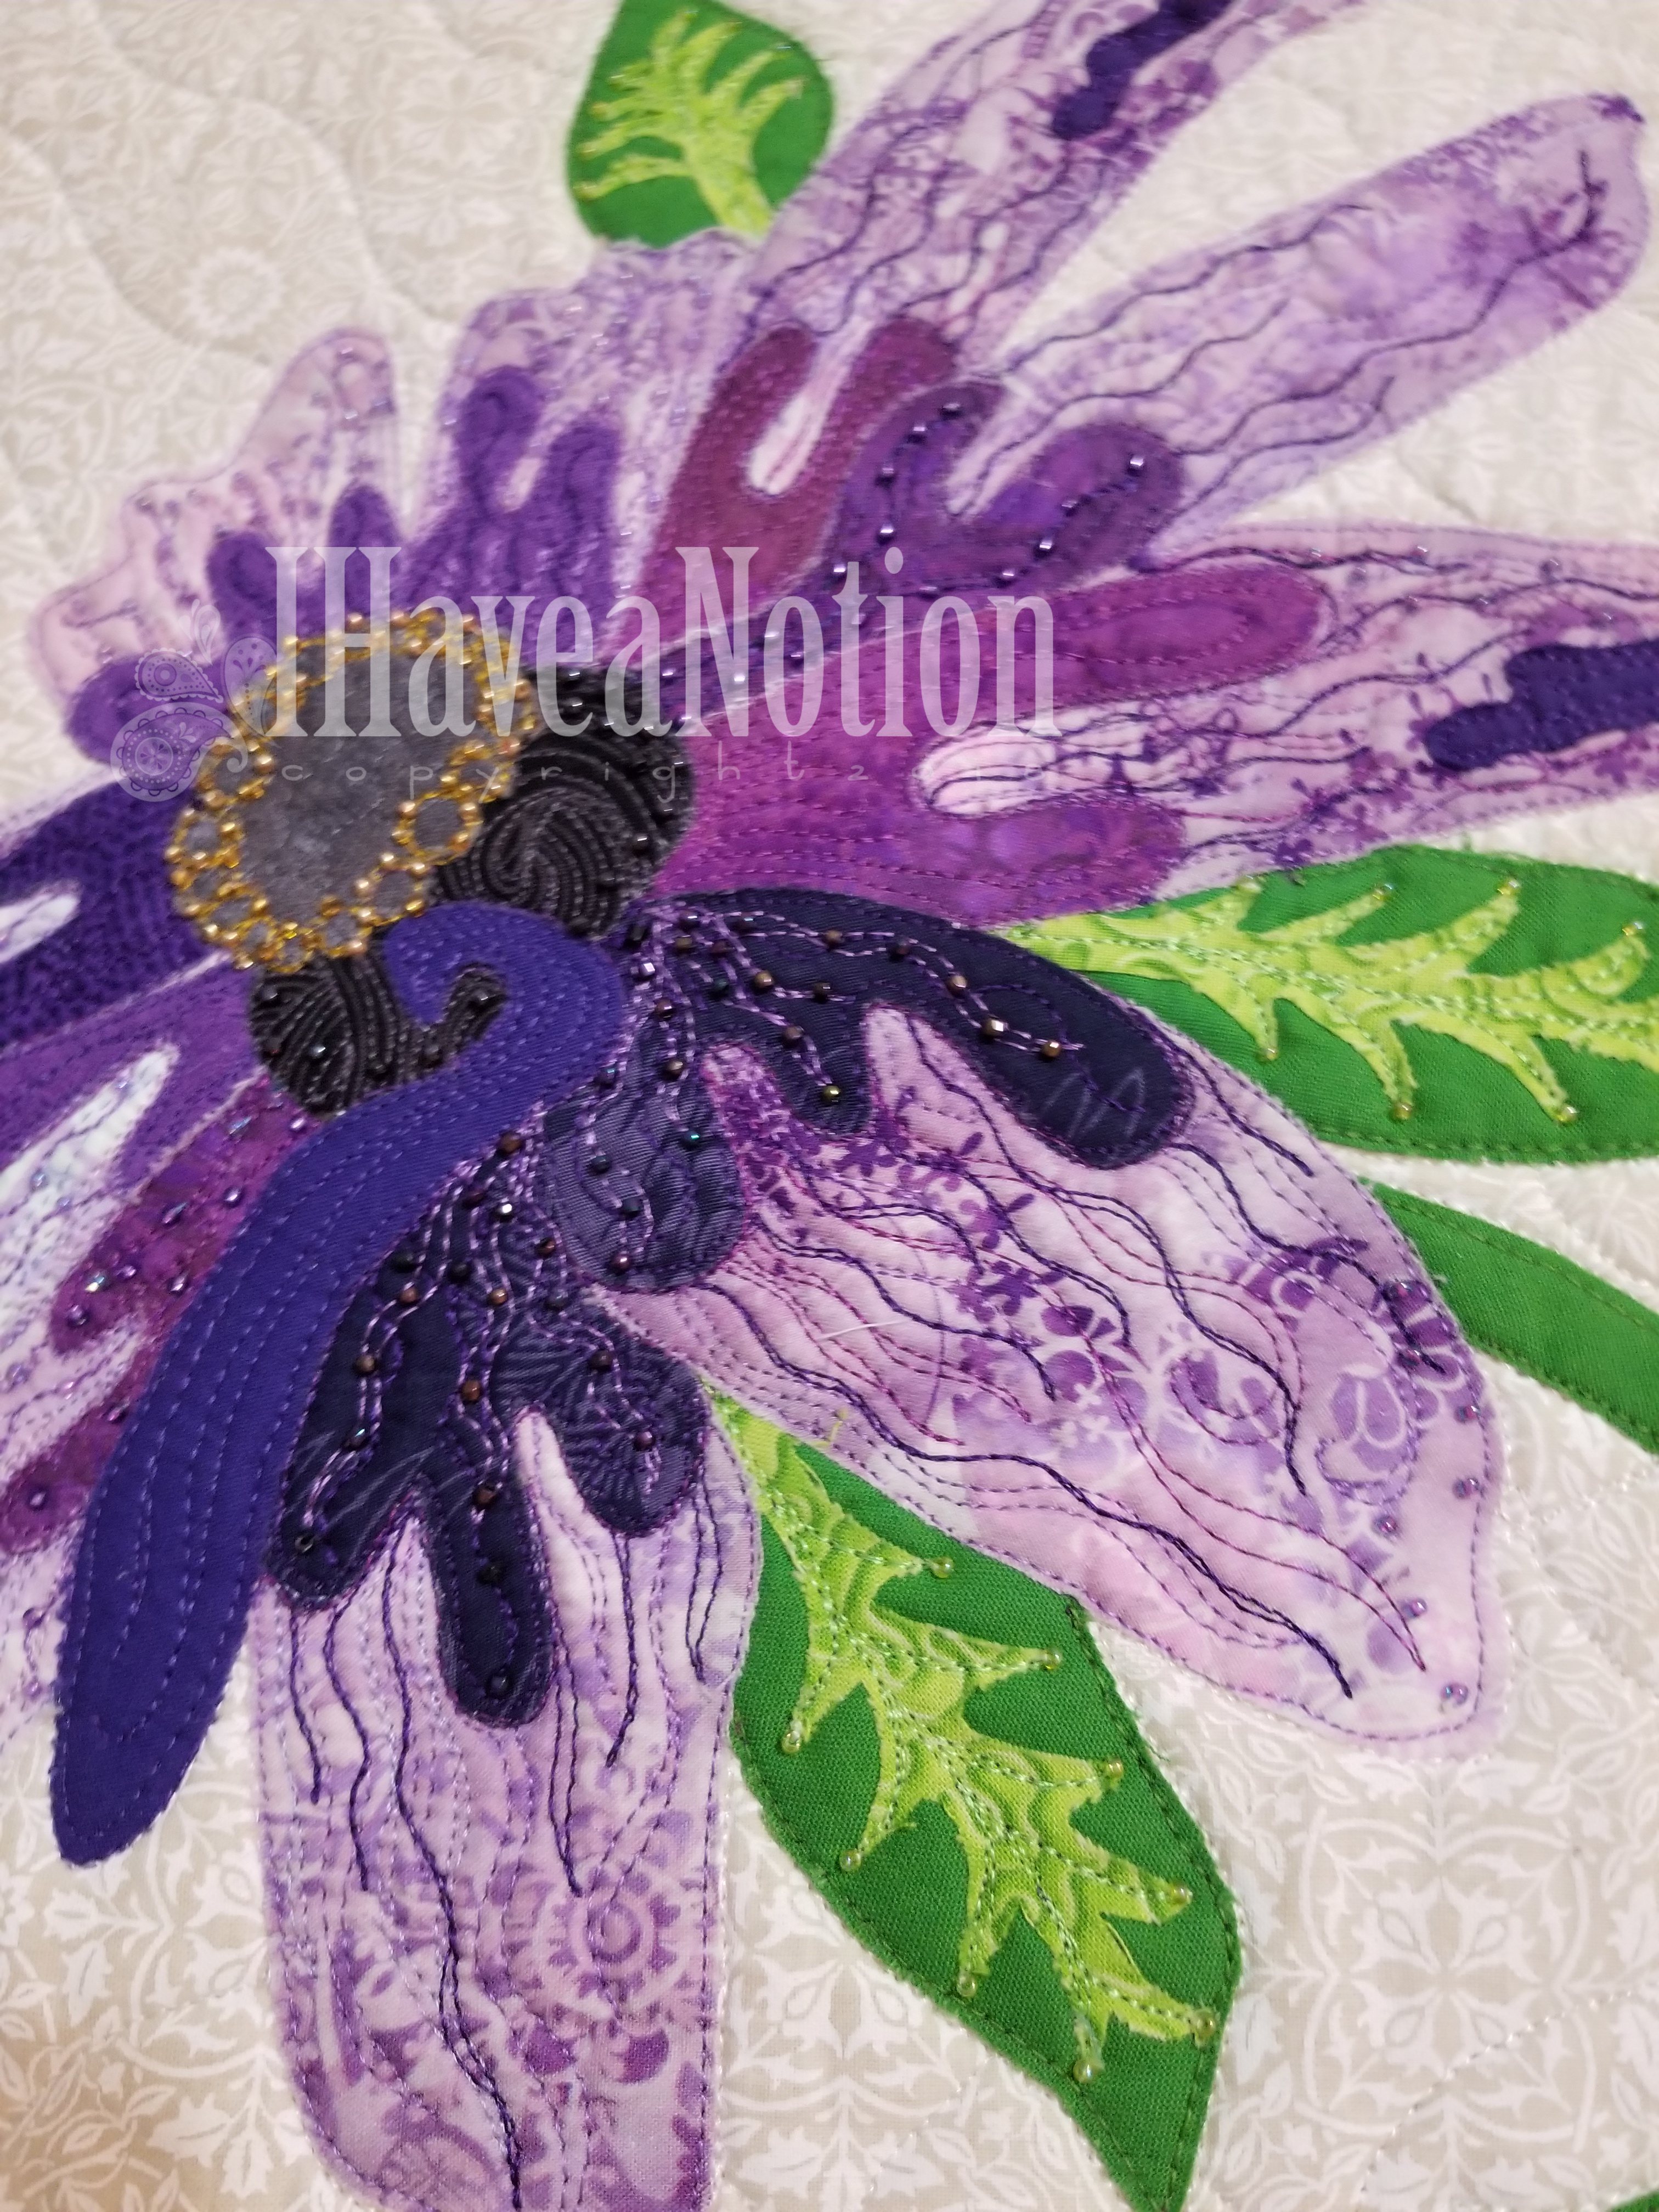
Finally!

Close up of the Purple Flower

Finally, this little flower is done. Completed in mid-January. Although I have made 2 others, this is the first one made from quilting cotton fabrics. The other two were made with batiks. It is not very big, only 22.5 inches square. Commercial cotton fabrics, fused, raw edge applique, free-motion thread play with cotton, rayon and polyester threads. I call it…. The Purple Flower. Catchy, No?

complete Purple Flower quilt

A Detail of the flower

Close up of the Purple Flower

The beading is complete.

Detail of the Purple Flower beads

The binding is done and a lable attached.

I have another finish too… but I’ll share that … a little later. Still busy with the camera and edits… and rewrites. I see that taking months!

What keeps you busy every day?

More Later… Beth

A Little Sticky, Some Blue and a TIP

the "chickens" on the longarm

Its been a little sticky and blue In the Creative Space. A picture of the ‘chickens’ loaded on the longarm was in the last post. So far that hasn’t changed, still no thread.

The Sticky

So what about the sticky and blue? I use a lot of fusible products and I try as many as I can find and afford. The favorite is paper backed, because I can draw my design and then transfer to fabric, with very little waste of either. I love Misty Fuse because it stays soft and retains a beautiful drape. Since Misty Fuse is just a web, getting the exact result is more difficult, because you need another way to transfer the marked lines/design to Misty Fuse, which can add another step to the process.

photo showing good stick with Barely There Fusible
Good Stick!

Last year I tried Barely There (the review) and in the store here. The few small things I tried it on worked out for the most part. Except for the occasion, where I forgot to use the correct heat setting on the iron. Oops! I used both Barely There and Misty Fuse on the ‘chicken’ quilt. Barely There for the construction of the chickens and egg flowers. While stitching down the chickens, I discovered some loose pieces. Not completely coming off, but enough that things could have shifted. So a bit more testing was in order.

I was afraid that I may have made an error when I decided that I liked Barely There! What could possibly make a fusible not stick well? The only thing, if all else was done correctly; the proper iron temperature and setting (made that mistake with the gecko) and/or the correct amount of pressing time would be the fabric. What could be wrong with the fabric? With fabric, the manufacturers finish or starch will keep a fusible from adhering well. So I prewashed the fabrics for this piece. Then I printed the pattern on to the Barely There, fused them to fabrics and proceeded. Verdict? Much better stick!

Stick was very important in this case because this piece is raw edge applique using regular quilting cotton, not batiks which have a finer thread and tighter weave. Regular ‘quilting’ cotton tend to have a thick thread and looser weave, making them susceptible to fraying. By prewashing the fabric good stick was achieved and with less fraying on all fabrics!

The Blue

the piece with the blue lines drawn

So what about the blue part of the sticky and blue? For the quilting, I drew a grid with a blue washout marker. Getting rid of the grid after quilting these days is the real problem, especially if you don’t always prewash your fabrics, (ask me how I know about this too). I have been sewing and quilting long enough that I remember the marks coming out fairly well with just a spritz if only one layer, and maybe a good wetting if more than one layer, (top, batting, backing). But here lately, you might actually have to submerge a project to get the blue out.

a corner with blue lines and lines erased with water

I have used just about every product made to remove the blue, and none of them seemed to work any better than water if they did anything at all. But while surfing, reading blogs and posts on the Internet, Facebook or Instagram, one day- I ran across a tip. Wish I could remember from where and give the kudos and credit and link directly to their page, but I can’t. (edit- I found it!) For the story from the tipper go to www.piecenquilt.blogspot.com I even tried a search and a look back through daily history. But no such luck. If you know who…please tell me, I’ll add it!

The Tip

Quilting done, blue lines gone

Mix 1 teaspoon of baking soda with 1 cup cold water. Mix well and place in a spray bottle. And then proceed as normal. All the blue came out, no resprays or touch-ups. I left a corner and as you can see, it was a rather thickish line. I used the Mark-B-Gone from Dritz, it makes a thick line but marks fast and for a simple grid, it works great! Going to keep a spray bottle with soda water in it. I suppose a flat bottle , (as in no bubbles), of soda water would work too, now that I think about it!

Have you had difficulty getting the blue out? Do you have another method that works well? Please share in the comments if you do!!!

More later-Beth