A Name Change : is always difficult

I have been sharing the creation of the Hours and Hours quilt during the last few weeks. You can find the previous blogs here, here, and here. And I have a plan for moving forward. But I have a much bigger task to complete before I can begin quilting.

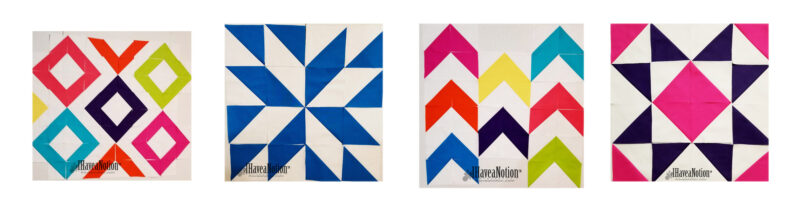
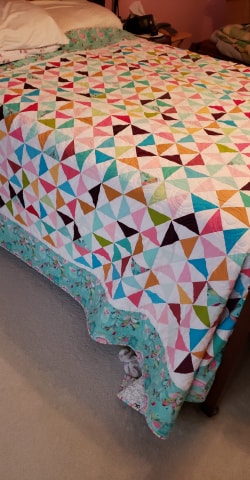
So this is where we are

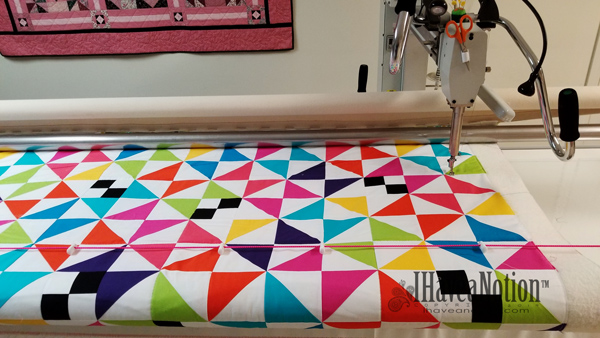
Loaded on the longarm for quilting. I knew I might have to take the quilt off the frame once or twice, so I basted the quilt and pinned to the leaders. I have already taken it off once, to quilt a gift quilt, put it back on.

Hours and Hours loaded
The Hours Quilt loaded on the Longarm

The Plan

How am I going to quilt this quilt? For planning, I took a photo of the quilt and enlarged it to 17″x 22″. Printed it out in black and white and played with the plan for quilting with a pen. I had originally played with the quilting plan on the tablet with a stylus, but that was much too tedious.

A drawn diagram of the plan for quilting the Hours Quilt
A diagram of the quilting plan for Hours and Hours

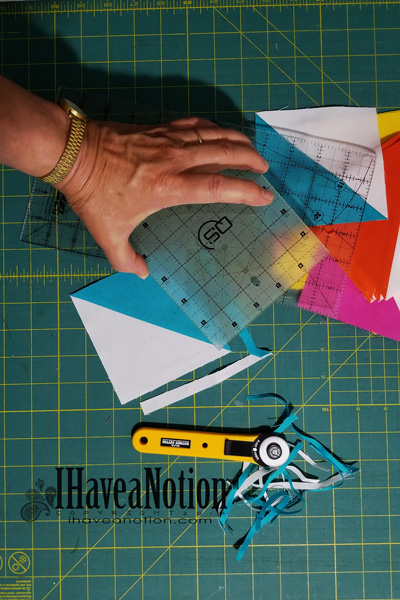
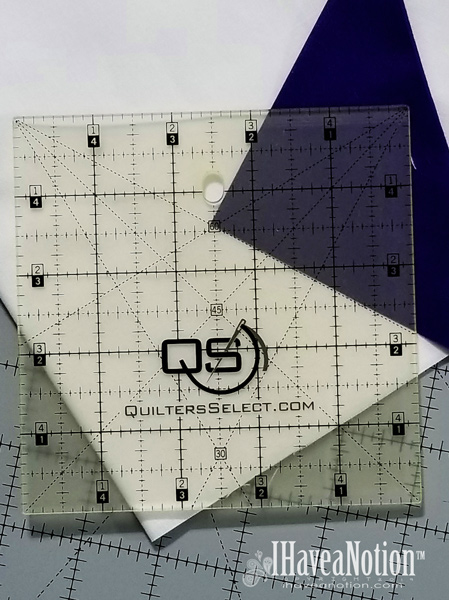
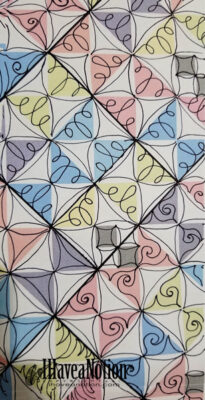
The plan is to use rulers for the white. I am planning to do a continuous curve in all the white triangles and a variety of free-motion fills for the color triangle.

A detail pictuer of the quiltng plan for Hours and Hours
A Detail of 4 sections of the quilting plan for the hours quilt

What do I know

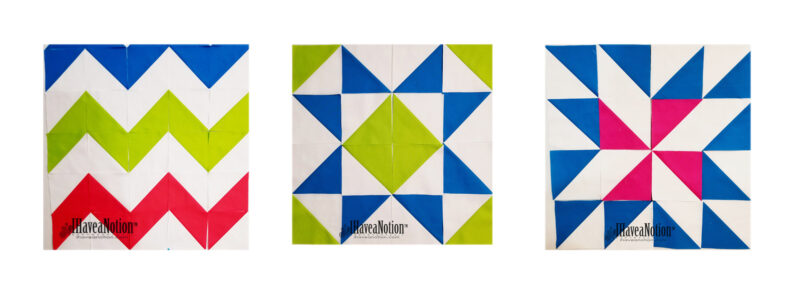
You can see that the plan is to create lots of texture and have some fun while quilting. I know the white will be quilted with a white thread. But, have not yet decided if I will choose to quilt the color triangles in white or another color or change for each color. If you have an opinion, chime in!!!

The Why for a name change

You may be wondering why the need for a name change from Hours and Hours to Months and Months. Because I have to take the quilt off the Longarm and set it aside while I move the longarm. However, in order to move the longarm, I need to make some other changes. Those other changes will occupy the weeks before moving the longarm to a new space.

I have been looking forward to quilting this quilt. The colors remind me of summer. A grand summer filled with family fun, warm days spent in swimming pools or the beach, barbeques and picnics, lawn games, late dusk games of hide and seek, fireflies and ice cream! If you don’t have an opinion of the thread colors, tell me what summer means for you.

Until later. Beth

Squaring UP: using Quilters Select Ruler

Now that all the blocks have been sewn, cut and pressed open, it was time to start squaring up and trimming the blocks. I used the 5 inch Quilter Select Ruler, the same one I used in the blog post about Using the Tools, when the squares were originally subcut from the fabric strips.

3 reasons to use Quilters Select Ruler for squaring up

Reason 1- picking it up

The 5″ square Quilters Select ruler is just the right size; since the blocks are to be squared at 4 1/2” and it is easily picked up and moved about with just one hand. As I get older I find that my hands do not want to work any harder than they have to.

Picking up with one hand
Using the ruler with one hand

Reason 2- non-slip

The Quilters Select non-slip coating makes accurate cut easier. One of the things that often takes the joy out of creating is when my ruler slips. It makes me feel frustrated and inadequate, especially, when I have ruined a piece of fabric or a block because the ruler slipped. I have found that the coating on these rulers really helps them stay in place, especially when squaring up a block.

The 5" Square Quilters Select tint
The non-slip coating is yellow and lends a frosted look to the ruler

Reason 3- squaring up made simple

One of the most helpful aspects of the Quilters Select Rulers is the angle guidelines (30°, 45°, and 60°) and most of the rulers have 2 sets of the angle guidelines. You can see (in the photo below), the first set of angle lines, where the blue meets the white and the second set at the bottom of the block in the white.

showing the 2 sets of angle lines on 5 inch Quilters Select ruler
The 2 sets of Angle Lines on the Quilters Select ruler

Once, all the blocks were pressed, next came squaring up the half-square triangle blocks. To square up, I lined the 45°line up on the diagonal seam line, very close to the top edge of the square, and trimmed the first two sides, (the right side and the top). I then took ruler off; turned the block and trimmed the other two sides, by again lining up the 45° line on the diagonal seam and the 4 1/2 inch dashed lines on the 2 previously trimmed sides. There were 8 colors, plus the white and a bit of black, and each combination had 32 squares for a total of 256 half triangle blocks!

Stack of trimmed and squared half-square triangle blocks
Pressed, trimmed and stacked half-square triangle blocks

A note about “The Trick”

I discovered while squaring up these blocks, that the ability to turn the ruler and the fabric together (the trick)only happens on the Quilters Select Mat. If using any other brand of mat that is not as smooth as the Quilters Select mat, (like the Olfa and Fiskars mats that seem to have a slightly rougher texture), “The Trick” doesn’t work.  But I like the non-slip aspect of the ruler, more than the ability to turn the block or squaring up!!!

Designing the Quilt Top

After squaring up all the half-square triangle blocks, I took them to the design wall… Originally what little plan I had when I began this project, has almost come together. I chose the colors after going to QuiltCon 2019. I blogged here and here about the what I saw at Quiltcon. However, I was not happy with any of the experimental designs I played with on the design wall.

I played

Four Block Ideas
4 possible ideas

and played a bit more

Three Alternative Block Ideas
3 More possible ideas

But I finally landed on a design. I discovered, on Facebook, a subtle hourglass quilt created by a friend, (Betty Elliott), and thought “That’s IT!” An hourglass quilt. Isn’t it beautiful?

Inspirational Hour Glass Quilt
The inspiration quilt B Elliotts Hourglass Quilt

Next up the question of the borders. Do you plan everything before you start a project, or do you just start with a thought and grow from there? I think you can guess how I start… most of my projects… How do you start yours?

Beth

The State of the Store: Values, Stock and Products

old I Have A Notion web banner
Where We Were

In a little less than a year the state of the store has changed significantly. The web site started crashing and elements were not functioning requiring major renovations. I Have A Notion™, started down the road to the new look, new web site, new stock; well new everything! The site is modernized, sleek and organized. It will always be a work in progress, but the key elements are in place.

What are the Goals

To improve the State of the Store, new stock and products are being added all the time. Not just the newest hottest things, but the tried and true. Products that have stood the test of time and continue to work as well as the day they were introduced. These tools continue to work and have a long useful life in the sewing room. In addition, adding the new innovative products that will help guide us down the road of creativity, either by updating the method of how or by making the current process easier or better.

a banner with several IHAN products

Values of I Have a Notion™

Modern retail is based on the cycle of buy-buy-buy, but let’s buy right! All of us can fall into the cycle of constantly upgrading before every really learning to use what we have. Part of my job at I Have A Notion™ is finding useful tools that do their job well for the cost. To that end, I am sourcing out the best tools for the best price. We can all find the least expensive items at the big box stores, and most of them will work well. At I Have A Notion™, the goal is to stock the ‘better categories of products where possible. Not the lowest priced “GOOD” and not the top of the line “BEST” products, but the “BETTER” that does the job, will last or have made significant enough changes to ‘Tried and True’ to warrant the upgrade! Focus on the best bang for the buck. Tools that will pay for themselves or elevate your experience to the next level or BOTH! The value will be there, if not by the price, then the benefits of the item.

Tested by Beth

My IDEA is to show you the difference! By the cost or value, by innovation, or that it has stood the test of time and is still relevant. There are many “Tried and True” products, (Blue Washout Markers), that I use when crafting and sewing. Some are “NEW and Improved” products, (Misting Spray Bottles), that make some aspect much better, easier or both. Where there is only one choice of a particular item, (Machingers Gloves), then that is the one you will find here. Where there is more than one choice (scissors or pins), then you get to make the decision on which is best for you. Still not sure… ASK! I will assist you in any way I can, and I always tell the truth. I love helping you find exactly what you need to be successful in CREATING. Can’t find a tool, something you really want to have? Please email (Beth at [email protected]) and we can see if it can be found!

The State of the Store will be ever changing as the stock and products, but the values will remain the same!

Beth

You can find the above products here: Misting Spray Bottles, Machingers Gloves, Vinyl Decals, Quilters Select Products, and Longarm Books.